Docker cluster swarm with consul

A quick post / howto  install a a swarm / consul cluster of dockers hosts and how to play with it. I will not go deep into details and lots of this from this post should and will be detailed or changed for a production environment.

How it will look like:
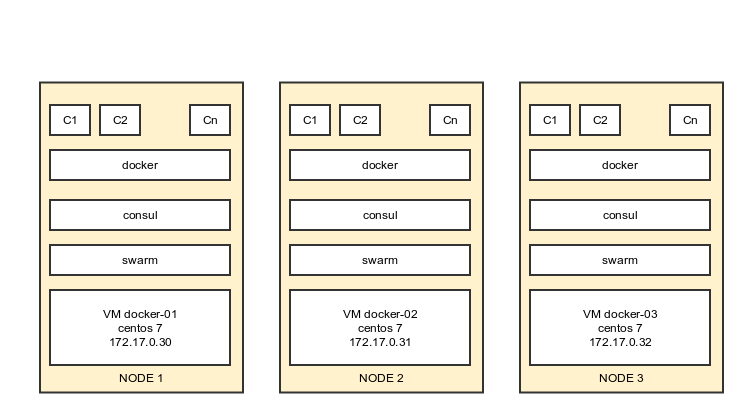
docker_cluster_swarm_consul
Docker cluster swarm consul


For the proof of the concept we will use 3 VMs in virtualbox.

Initially node1 , node2 , node3 will be identically configured. After the cluster is set up node1 will be also the management node.

Installing Node1:

[root@docker-01 server]# cat /etc/consul.d/server/config.json
{
    "bootstrap_expect": 3,
    "server": true,
    "data_dir": "/var/consul",
    "log_level": "INFO",
    "enable_syslog": false,
    "retry_join": ["172.17.0.30", "172.17.0.31", "172.17.0.32"],
    "client_addr": "0.0.0.0"
}
  • run consul agent
/usr/local/bin/consul agent -config-dir="/etc/consul.d/server/config.json" -ui-dir="/var/www/html">>/var/log/consul.log 2>&1 &
  • join the node in swarm cluster:


docker run -d swarm join --addr=172.17.0.30:2375 consul://172.17.0.30:8500/swarm


  • run the registration in consul service


docker run -d --name regdock01 -h docker01 -v /var/run/docker.sock:/tmp/docker.sock progrium/registrator consul://172.17.0.30:8500


  • run the swarm management:


docker run -d -p 3333:2375 swarm manage consul://172.17.0.30:8500/swarm


Installing Node2:

  • Install centos7
  • Disable firewald
  • Install docker from repo. Then update docker to 1.6.2 ( manually override /usr/bin/docker with the one from docker.io )  ( wget  https://get.docker.com/builds/Linux/x86_64/docker-latest )
  • Download and install consul (  wget https://dl.bintray.com/mitchellh/consul/0.5.2_linux_amd64.zip )
  • Add consul configuration file
    [root@docker-02 server]# cat /etc/consul.d/server/config.json
    {
        "bootstrap_expect": 3,
        "server": true,
        "data_dir": "/var/consul",
        "log_level": "INFO",
        "enable_syslog": false,
        "retry_join": ["172.17.0.30", "172.17.0.31", "172.17.0.32"],
        "client_addr": "0.0.0.0"
    }
  • run consul agent
    /usr/local/bin/consul agent -config-dir="/etc/consul.d/server/config.json" >>/var/log/consul.log 2>&1 &
  • join the node in swarm cluster
    docker run -d swarm join --addr=172.17.0.31:2375 consul://172.17.0.31:8500/swarm
  • run the registration in consul service
    docker run -d --name regdock02 -h docker02 -v /var/run/docker.sock:/tmp/docker.sock progrium/registrator consul://172.17.0.31:8500

Installing Node3:

  • Install centos7
  • Disable firewald
  • Install docker from repo. Then update docker to 1.6.2 ( manually override /usr/bin/docker with the one from docker.io )  ( wget  https://get.docker.com/builds/Linux/x86_64/docker-latest )
  • Download and install consul (  wget https://dl.bintray.com/mitchellh/consul/0.5.2_linux_amd64.zip )
  • Add consul configuration file
    [root@docker-03 server]# cat /etc/consul.d/server/config.json
    {
        "bootstrap_expect": 3,
        "server": true,
        "data_dir": "/var/consul",
        "log_level": "INFO",
        "enable_syslog": false,
        "retry_join": ["172.17.0.30", "172.17.0.31", "172.17.0.32"],
        "client_addr": "0.0.0.0"
    }
  • Run consul agent
    /usr/local/bin/consul agent -config-dir="/etc/consul.d/server/config.json" >>/var/log/consul.log 2>&1 &
  • Join the node in swarm cluster
    docker run -d swarm join --addr=172.17.0.32:2375 consul://172.17.0.32:8500/swarm
  • Run the registration in consul service
    docker run -d --name regdock03 -h docker03 -v /var/run/docker.sock:/tmp/docker.sock progrium/registrator consul://172.17.0.32:8500

Managing / viewing / running containers in cluster:


# show running containers in the cluster
docker -H tcp://172.17.0.30:3333 ps
# show cluster nodes infos
docker -H tcp://172.17.0.30:3333 info
# run containers in the cluster:
docker -H tcp://172.17.0.30:3333 run -d --name www1 -p 81:80 nginx
docker -H tcp://172.17.0.30:3333 run -d --name www2 -p 81:80 nginx
docker -H tcp://172.17.0.30:3333 run -d --name www3 -p 81:80 nginx


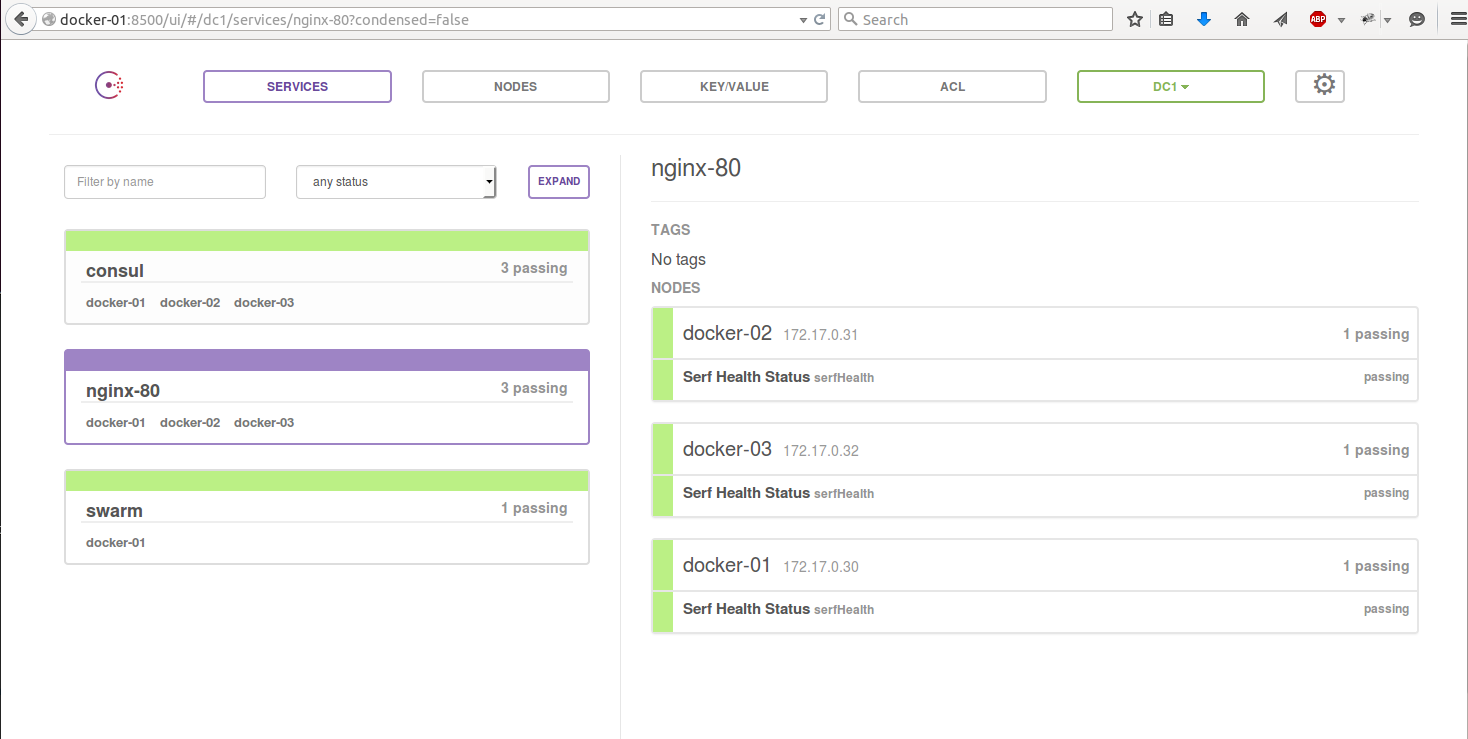
Consul web interface:


consul-web-ui
Consul web UI after install and deploy of 3 nginx containers


Ubuntu set local hostname via DHCP

Sometime for automation you need to be able to set the ubuntu hostname at  boot ( or at network restart ) via DHCP / DNS .

To be able to do that you only have to add in /etc/dhcp/dhclient-exit-hooks.d a file named hostname with the following content:


if [ "$reason" != BOUND ] && [ "$reason" != RENEW ] \
&& [ "$reason" != REBIND ] && [ "$reason" != REBOOT ]
then
return
fi

host=$(host $new_ip_address | cut -d ' ' -f 5)
host=${hostname:0:-1}
echo $host > /etc/hostname
hostname $host

What it does ? Simple it hooks dhcpclient and after the client receives the new ip from dhcp it will make a simple reverse lookup for the ip received
and will set the hostname accordingly.

Synology wake it up on LAN

Synology like any other recent and decent device accepts WakeOnLan . This comes very handy when you don’t want to keep it always on .
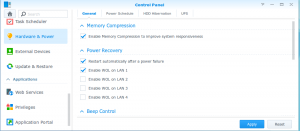
Setting synology is pretty easy . Just go to control panel , on Hardware and Power menu from the synology web interface and check Enable WOL on LAN1
wol-synology

However in order to wake it up you need to send in the network the magic packet to wake it.

I found that etherwake does the job right. Since i have eth1 connected to the internal network i’m using it like this:


etherwake -i eth1 00:11:33:22:bb:aa

where 00:11:33:22:bb:aa is the mac address from synology network card.

Ubuntu 14.04 adding HP proliant support pack (hpacucli problem solved)

tfm_logoIn the begining there was nothing but few baremetal. After a while someone delivers a whole bunch of baremetal on your doorstep and say : “I need them installed by tomorrow”. Same configuration … With the harddisks in raid and ubuntu on all of them . What do you do ?

It’s a big problem. Like most big problems you split it in lots of little problems that can be managed easier.
What you need to do for one baremetal:

  1. Update the ILO firmware and Bios (if necessary) . This will come handy: https://play.google.com/store/apps/details?id=com.hp.essn.iss.ilo.iec.spa&feature=search_result . I’m not going into details about it in this post
  2. Create the disk arrays
  3. Install the operating system on it
  4.  Configure it and deploy it.

For one server let’s say you can do it in few hours , few beers and some pizza’s. But … wait a minute .. There are a LOT of baremetals to be installed. One option is to call some friends and do that while you watch a movie.

OR you can be smart and automate the tasks. How ? What i need ?

You need a baremetal installer server or a laptop or a virtual something (virtual box / vmware / you choose )  image that will do the job for you while you sit back and relax.

The ideea is simple:

  • Baremetal will boot from network
  • tftp server will deliver the boot image, boot it , get an ip addres from the dhcp server and register the new server into the baremetal installer and will fill the hardware configuration there.
  • Then you can ( using ansible  ) to actually do the raid configuration ,  bios updates ,  firmware updates, and operating system install.
  • Add the necessary configurations.
  • Once complete the system will boot from raid and you have a system up and and running ready to be deployed.

Now … Back to the post subject .

How you can configure HP raid from inside  ubuntu ? In order to have in the network bootable image the proper tools to do actually do the configurations…

First we install hpacucli :


sudo echo "deb http://downloads.linux.hp.com/SDR/downloads/MCP/ubuntu precise/current non-free" >>/etc/apt/sources.list
wget http://downloads.linux.hp.com/SDR/downloads/MCP/GPG-KEY-mcp
sudo apt-key add GPG-KEY-mcp
sudo apt-get update
apt-get install cpqacuxe hp-ams hp-health hpacucli hponcfg
service hpsmhd stop
update-rc.d hpsmhd disable
hpasmcli -s "show server"

Then when we boot the new baremetal to be installed we can gather the informations about the raids:


hpacucli ctrl all show config

That will produce an output like ( in this case i already configured the raid:


Smart Array E200i in Slot 0 (Embedded) (sn: VX9AMP1927 )

array A (SAS, Unused Space: 0 MB)

logicaldrive 1 (136.7 GB, RAID 1, OK)

physicaldrive 1I:1:1 (port 1I:box 1:bay 1, SAS, 146 GB, OK)
physicaldrive 1I:1:2 (port 1I:box 1:bay 2, SAS, 146 GB, OK)

At this point you can create some scripts that will create the partitions in the way that the shareholder wants them.

for example:


hpacucli ctrl slot=9 create type=logicaldrive drives=1I:1:3,1I:1:4 raid=1

Custom version of nginx in Ubuntu

Building a custom ( adding a custom plugin )  version of nginx in debian is not a very complicated job:

Create a directory  ( ex test2 ) and change directory to it.

After that do:

apt-get source nginx

in debian directory you should modify rules file , then if necessary  source/include-binaries , add your module in modules directory and modify README.Modules-versions to reflect your changes .

Change back to test2/nginx-1.4.1 directory and run

dpkg-buildpackage -b

If everything works ok and module is configured correctly you should have it ready to be run:

dpkg -i nginx-full_1.4.1-3ubuntu1.3_amd64.deb nginx-common_1.4.1-3ubuntu1.3_all.deb


Enjoy.